
Faux Ceiling Beams: Ideas, Materials and Installation
A designer's guide to faux ceiling beams: what they are, polyurethane vs timber, how to size and space them, 15 ideas for living rooms, kitchens and bedrooms, rough costs, safety points and a step by step installation guide.
By Magda Callery, interior designer and florist
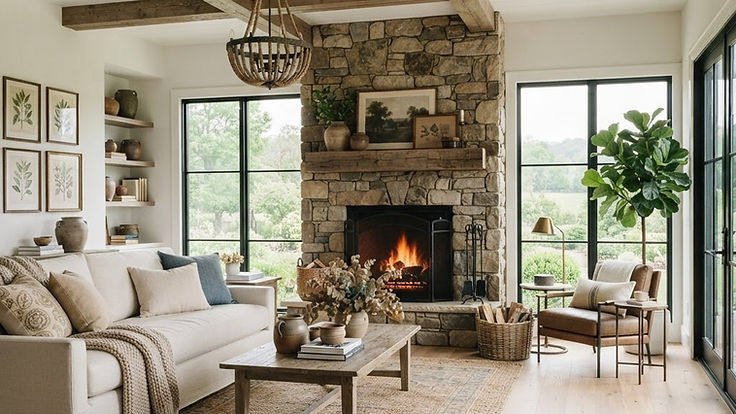
Exposed ceiling beams give a room instant character, warmth and a sense of history. The problem is that most of us don't live in a barn, a cottage or a timber-framed farmhouse, and adding real oak beams to a modern ceiling is heavy, expensive and often structurally impractical. Faux beams solve that: they look like solid timber, weigh a fraction as much and can be fitted in a day or two.
In this guide I'll explain what faux ceiling beams are, the materials to choose from, how they compare with real beams, how to size and space them so they look convincing, 15 design ideas for different rooms, rough costs, a step by step installation guide and the safety points worth knowing before you start.
What Are Faux Ceiling Beams?
Faux ceiling beams are decorative, non-structural beams that are fixed to an existing ceiling to look like exposed timber. Most are hollow, three-sided "U" shapes that slide over mounting blocks screwed to the ceiling joists, so the beam appears solid from below. They don't hold anything up; their job is purely visual, although they can also hide wiring, pipes or a joint in the ceiling.
| Question | Quick answer |
|---|---|
| What are they? | Decorative, hollow beams fixed to the ceiling to look like solid timber |
| Common materials | High-density polyurethane foam, boxed timber, reclaimed wood wraps and MDF |
| Weight | Polyurethane beams weigh roughly 1 to 2 pounds per linear foot (about 1.5 to 3kg per metre) |
| Structural? | No, they're purely decorative |
| DIY friendly? | Yes, with a helper, a drill and careful setting out |
| Best for | Farmhouse, cottage, Spanish, manor house, coastal and modern rustic rooms |
Faux Beams vs Real Beams
| Faux beams | Real timber beams | |
|---|---|---|
| Weight | Very light; Architectural Depot puts polyurethane beams at roughly 1 to 2 pounds per linear foot | Very heavy; a 200 x 200mm oak beam 4m long is around 0.16m³ of timber and can easily weigh well over 100kg |
| Structure | Fixed to blocks on the joists; no structural work | Often needs an engineer, extra support and building control |
| Cost | Much lower to buy and install | High for timber, delivery, lifting and labour |
| Look | Very convincing when well made and finished | Completely authentic, with real grain and age |
| Movement | Polyurethane won't warp, crack or rot | Timber can twist, check and move as it dries |
| Maintenance | Virtually none | May need treating or refinishing |
If you're restoring a period home or building an oak frame extension, real timber is worth it. For adding character to an ordinary ceiling, faux beams are usually the sensible choice.
Choosing the Material
| Material | What it is | Pros | Cons |
|---|---|---|---|
| High-density polyurethane | Moulded foam cast from real timber, with a hand-hewn or smooth texture | Very light, realistic, won't rot or warp, easy to install | Check fire performance; can look plastic if cheaply finished |
| Boxed timber | Three timber boards joined into a U shape | Real wood grain, can be stained or painted | Heavier than foam; joints must be neat |
| Reclaimed wood wraps | Thin faces of reclaimed timber fixed around a box | Authentic weathered character | More expensive; needs a skilled fitter |
| MDF box beams | MDF boards boxed and painted | Cheap and smooth for painted beams | Not realistic stained; not for damp rooms |
| Solid decorative timber | Real sawn or hand-hewn beams | The most authentic look | Heavy, costly, needs structural fixing |
For most homes, I'd choose either a good quality polyurethane beam with a realistic hand-hewn texture, or a boxed timber beam in oak or reclaimed pine if you want real grain you can touch.
How to Size and Space Faux Beams
The most convincing faux beams follow the same logic as real ones. A few rules make all the difference.
- Run them across the shorter span of the room, as real joists and beams would.
- Scale them to the ceiling height. According to Architectural Depot, ceilings of around 8 to 9 feet (about 2.4 to 2.7m) usually suit beams about 5 inches wide and 3 inches deep (roughly 13 x 8cm); larger rooms with higher ceilings can take wider, deeper beams.
- Space them evenly. Beams are typically spaced 2 to 8 feet apart, with 4 feet (about 1.2m) being common.
- Line them up with the room's features, such as a window, a fireplace, a kitchen island or the centre of the room.
- Use odd numbers in smaller rooms; three beams usually looks more natural than two or four.
- Leave equal gaps at each end, so the pattern looks planned rather than squeezed in.
On low ceilings, below about 2.4m, choose slim, shallow beams, space them more widely or paint them the same colour as the ceiling so they add texture without making the room feel lower.
15 Faux Ceiling Beam Ideas
Living rooms
1. Rustic oak beams in a modern farmhouse. Warm, weathered oak beams across a white ceiling with a stone fireplace, linen sofas and natural textures. The most popular look of all.
2. A great hall feel. Dark, chunky beams with panelling, flagstones and a big fireplace give a room the character of a traditional manor house, even in a new build.
3. A single statement beam. One beam across the middle of the room, or a chunky beam above an opening where a wall has been removed, adds character without overwhelming the ceiling.
4. Beams over tongue and groove. Beams running across a white painted tongue and groove ceiling give a barn or coastal cottage look.
5. Whitewashed beams for a coastal feel. Limed or whitewashed beams look lighter and fresher, ideal with pale floors and linen.
Kitchens and dining rooms
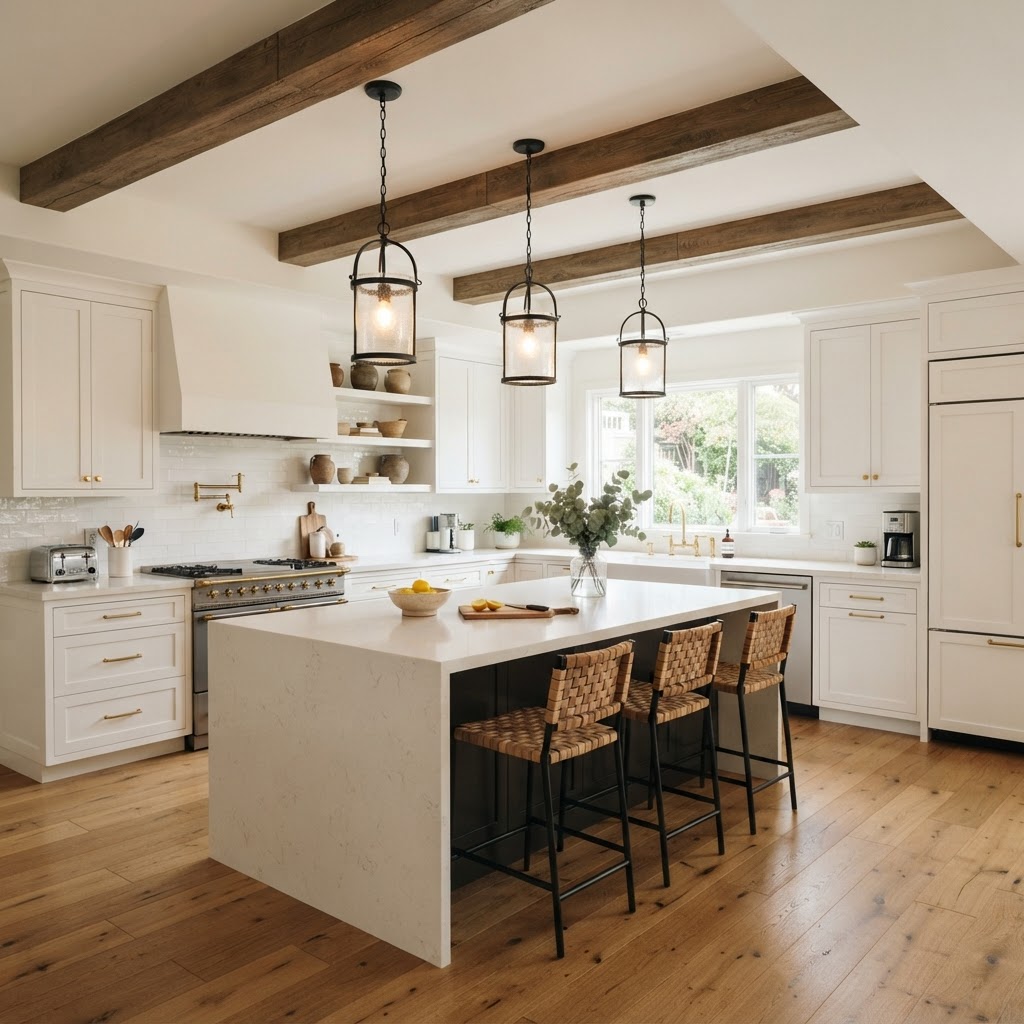
6. Beams over the kitchen island. Two or three beams above an island give pendants a natural place to hang from and define the cooking zone. They look especially good above painted cabinets in soft colours, such as sage green kitchen cabinets.
7. Beams in a kitchen extension. Faux beams can add warmth to a sleek, white extension, so it feels connected to an older house.
8. A beamed dining room. Beams above a long dining table with a low pendant make the room feel intimate and convivial.
Bedrooms and lofts
9. Beams on a vaulted ceiling. Collar ties or ridge beams on a vaulted or loft ceiling emphasise its height and shape.
10. Spanish and Mediterranean beams. Dark beams against rough white plaster are a signature of a Spanish style bedroom, especially with terracotta floors and an iron bed.
11. Painted beams. Beams painted in a soft colour, such as a muted olive green or the same warm white as the ceiling, add texture with a modern edge.
Other ideas
12. A coffered grid. Beams in two directions create a coffered ceiling, which suits studies, libraries and formal dining rooms.
13. Slim timber battens. For a Japandi or Scandi room, slim, closely spaced timber battens feel lighter and more contemporary than chunky beams, echoing the timber ceilings of Japanese house design.
14. Beams that hide services. Hollow beams can conceal wiring for downlights or pendants, or hide a pipe or a joint in the ceiling, as long as the work below is done safely by a qualified electrician.
15. Porches, pergolas and garden rooms. Polyurethane beams are suitable for exterior use, so they can add timber character to a porch or covered terrace without the risk of rot.
How Much Do Faux Ceiling Beams Cost?
Prices vary widely with the material, size, finish and supplier, so treat these as rough UK guide figures.
| Item | Rough cost | Notes |
|---|---|---|
| Polyurethane faux beam | Often around £40 to £150+ per 3m length | Depends on size, texture and finish |
| Boxed timber beam (DIY) | Often around £30 to £100 per 3m in materials | Depends on the timber species |
| Reclaimed wood beam wraps | Often £100+ per metre | Premium, authentic look |
| Mounting blocks, adhesive and screws | A small extra per beam | Timber blocks and construction adhesive |
| Carpenter or fitter | Around £200 to £350 per day | A typical room often takes one day |
For an average living room with three or four beams, a DIY polyurethane installation might cost a few hundred pounds, while a professionally fitted reclaimed timber scheme can run into four figures.
How to Install Faux Ceiling Beams
This method is for hollow polyurethane or boxed beams fitted with mounting blocks, which is the most common approach. Always follow the manufacturer's instructions for your product.
What you'll need
- Faux beams and any joint straps or end caps
- Timber for mounting blocks
- A stud or joist finder, chalk line, tape measure and spirit level
- A drill, screws long enough to reach well into the joists and a countersink bit
- Polyurethane construction adhesive
- Colour-matched caulk or filler and touch-up paint or stain
- A sturdy platform and a helper
Step 1: Acclimatise the beams
Bring the beams into the room before fitting. Architectural Depot recommends letting polyurethane beams acclimatise to room temperature for 10 to 12 hours.
Step 2: Plan the layout
Find the joists and mark the beam positions with a chalk line or painter's tape. Look at the layout from different parts of the room, and from the doorway, before committing.
Step 3: Fix the mounting blocks
Cut blocks to fit snugly inside the beam, about 3mm (1/8 inch) smaller than the internal dimensions. Architectural Depot advises a block at each end, one roughly every 3 feet (about 90cm) and one at every joint. Screw each block securely into a joist or truss with at least two screws.
Step 4: Add adhesive
Apply construction adhesive to the edges of the blocks where the beam will sit.
Step 5: Fit the beam
Lift the beam over the blocks with a helper, check it's straight, and fix it through the sides into each block with countersunk screws, at least two per side per block. Use adhesive and screws rather than nails.
Step 6: Finish the joints and screw holes
Fill screw holes and any gap against the ceiling with colour-matched textured caulk, blending it while it's wet, then touch up with paint or stain. Joints between lengths can be hidden with matching straps or wraps.
Safety and UK Considerations
- Fire performance. Polyurethane foam is combustible, so ask the supplier for the product's fire classification, especially for hallways, landings and escape routes. In England, wall and ceiling linings are covered by Approved Document B, and the same fire rules that apply to a timber tongue and groove ceiling are worth checking here.
- Keep beams away from heat. Don't fit polyurethane beams close to a wood burner flue, stove or high-wattage light fitting.
- Lighting and wiring. Any new wiring or light fittings in or on beams should be installed by a registered electrician. Heavy pendants should hang from a fixing into a joist, not from a hollow beam.
- Textured ceilings. If you're drilling into an old Artex or textured ceiling, have it tested for asbestos first.
- Never rely on faux beams for structure. If you're removing a wall, the real structural beam must be designed by an engineer; a faux beam can then be used to clad it.
Common Mistakes to Avoid
| Mistake | Why it's a problem | What to do instead |
|---|---|---|
| Beams too big for the ceiling | Makes the room feel low and heavy | Scale beams to the ceiling height |
| Running beams the "wrong" way | Looks unconvincing | Run them across the shorter span |
| Uneven spacing | Looks improvised | Measure and set out carefully |
| Cheap, shiny finishes | Instantly looks fake | Choose a realistic hand-hewn texture and matt finish |
| Visible joints and screw heads | Gives the game away | Use straps, caulk and touch-up stain |
| Too many styles at once | Clashes with the room | Match the beam colour to floors or furniture |
Frequently Asked Questions
Do faux ceiling beams look real?
Good quality faux beams with a hand-hewn texture, a matt finish and well hidden joints can look very convincing, especially from below and at a distance.
How far apart should faux beams be?
Beams are typically spaced between 2 and 8 feet apart, with around 4 feet (1.2m) being common. In small rooms, space them evenly with equal gaps at each end.
Which direction should ceiling beams run?
Usually across the shorter width of the room, as real beams and joists would, or lined up with a key feature such as a window or fireplace.
Can you put faux beams on a low ceiling?
Yes, but choose slim, shallow beams, space them more widely or paint them the ceiling colour, so they don't make the room feel lower.
How heavy are faux beams?
Polyurethane faux beams typically weigh around 1 to 2 pounds per linear foot, roughly 1.5 to 3kg per metre, far lighter than solid timber.
Can you hang lights from faux beams?
Light pendants can be hung from beams if the fixing goes into a joist or a properly fixed block. Wiring should be installed by a registered electrician.
Can faux beams be used outside?
Polyurethane beams are suitable for exterior use, such as porches and pergolas, as they won't rot, warp or attract wood-boring insects.
Are faux beams tacky?
Not when they suit the house and are well chosen. Scale, spacing, finish and a style that matches the rest of the room are what make them look convincing.
Add Character From Above
Faux ceiling beams are one of the quickest ways to give a plain room warmth and history. Choose a realistic material, scale and space them properly, fix them securely into the joists and finish the joints carefully, and nobody will know they're not the real thing.
For more ceiling and renovation ideas, explore the interior design section, and if you'd like help planning beams, lighting and finishes for your own room, you can book a one-hour online interior design consultation with me.
About the author
Magda Callery is a UK interior designer and florist with more than 15 years' experience designing homes, pubs, restaurants and bars, and her expert commentary has featured in Homes & Gardens, The Mirror and The Spruce. Explore more of the interior design articles.
Continue reading


Microcement Bathroom: Pros, Cons, Costs and Ideas
Everything you need to know about a microcement bathroom: what microcement is, how it compares with tiles and tadelakt, whether it's waterproof, applying it over tiles, UK costs per m², 12 design ideas, maintenance and how to choose an installer.

Sage Green Kitchen Cabinets: Paint Colours and Ideas
A designer's guide to sage green kitchen cabinets: the best sage paint colours, what worktops, handles, walls and floors to pair them with, 10 kitchen ideas, how to paint your cabinets properly, rough costs and mistakes to avoid.


Tongue and Groove Ceiling: Ideas and How to Install
Everything you need to know about tongue and groove ceilings: how they differ from shiplap and beadboard, materials and profiles, 15 ideas, rough UK costs, the fire safety rules many guides miss, and a step by step installation guide.