
Microcement Bathroom: Pros, Cons, Costs and Ideas
Everything you need to know about a microcement bathroom: what microcement is, how it compares with tiles and tadelakt, whether it's waterproof, applying it over tiles, UK costs per m², 12 design ideas, maintenance and how to choose an installer.
By Magda Callery, interior designer and florist
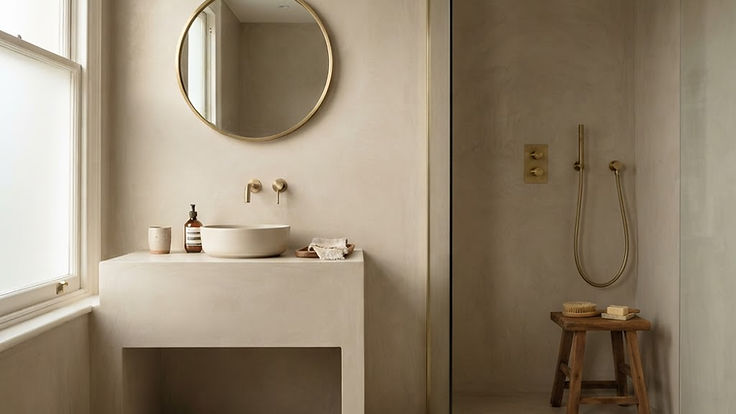
A microcement bathroom is the closest thing to a spa you can create at home. Walls, floor, shower and even the vanity flow together in one seamless, softly textured surface, with no grout lines to scrub and a calm, sculptural look that tiles can't quite match. It's also one of the most misunderstood finishes in interiors: done well, it's beautiful and practical; done badly, it cracks, stains or lets water through.
In this guide I'll explain what microcement is, how it compares with tiles, tadelakt and resin, the real pros and cons, whether it's waterproof, whether it can go over tiles, how it's applied, what it costs in the UK, 12 microcement bathroom ideas, how to look after it and the questions to ask your installer.
What Is Microcement?
Microcement is a thin, cement-based coating made from cement, polymers, fine aggregates and additives, trowelled by hand onto walls, floors and fixtures to create a seamless, concrete-like finish. According to Homebuilding & Renovating, it's called "micro" because it's laid so much thinner than standard concrete: around 2 to 3mm, or 3 to 4mm once finished, and roughly 2 to 3kg per m², which is far lighter than tiles.
Because it's applied by hand, it can wrap around corners, shelves, niches, vanities, window reveals and even shower trays and baths, which is what gives a microcement bathroom its monolithic, carved-from-one-piece look.
| Question | Quick answer |
|---|---|
| What is it? | A thin, polymer-modified cement coating applied by trowel |
| Thickness | Around 2 to 4mm when finished |
| Where can it go? | Walls, floors, showers, vanities, shelves and baths |
| Can it go over tiles? | Often yes, if the tiles are sound and properly prepared |
| Is it waterproof? | The system can be, with the right product, tanking and sealer |
| UK installed cost | Roughly £130 to £180+ per m² for bathroom walls |
| Lifespan | Experts quoted by Homebuilding suggest 5 to 10+ years, depending on the installation |
Microcement vs Tiles vs Tadelakt vs Resin
| Finish | What it is | Pros | Cons |
|---|---|---|---|
| Microcement | Thin cement and polymer coating | Seamless, versatile, can go over tiles | Needs a skilled installer; hard to patch invisibly |
| Tiles | Ceramic or porcelain with grout joints | Durable, easy to repair, huge choice | Grout lines to clean; less seamless |
| Tadelakt | Traditional Moroccan lime plaster, polished and sealed with soap | Beautiful, soft and breathable | Expensive, very specialist, needs care |
| Polished plaster | Lime or marble plaster, often sealed | Luxurious finish | Usually best away from direct water |
| Resin | Epoxy or polyurethane coating | Very hard wearing, seamless | Can look flat and synthetic |
The Pros and Cons of a Microcement Bathroom
| Pros | Cons |
|---|---|
| Seamless, with no grout lines for dirt and mould to collect in | Needs a skilled, experienced installer |
| Thin and light, so it can often go over existing tiles | Hard to patch; repairs are rarely invisible |
| Can coat walls, floors, vanities, niches and shower trays | Can crack if the substrate moves |
| Calm, spa-like and contemporary | Needs the right waterproofing and sealers |
| Wide choice of colours and textures | Usually costs more than mid-range tiles |
| Non-slip finishes available for floors and showers | Drilling later can compromise the surface |
The experts quoted by Homebuilding & Renovating are refreshingly honest about repairs. Richie Butt of Relentless Microcement says it "isn't easy to patch, and almost impossible to do seamlessly", so the best approach to damage is usually to repair and recoat the whole surface.
Is Microcement Waterproof?
This is the most important question, and the answer depends on the system. A good bathroom system uses a product designed for wet areas, a waterproof base and multiple coats of a protective sealer. Homebuilding's experts advise against using a non-waterproof microcement and relying on the sealer alone, and recommend a tanking system underneath, especially in showers and wet rooms.
In practice, ask your installer:
- Is the microcement itself rated for wet areas, or only the sealer?
- What tanking system goes underneath in the shower, and how are corners and joints reinforced?
- How many coats of sealer will be applied, and what type?
- How are taps, drains and niches detailed to keep water out?
Can Microcement Go Over Tiles?
Often, yes. One of microcement's biggest advantages is that it can be applied over existing sound tiles, avoiding the mess and cost of stripping a bathroom back to the walls. The tiles must be firmly fixed, clean and free of grease, and the grout lines are usually filled and primed first, often with a fibreglass mesh embedded in the base coat to help prevent cracking. Loose, cracked or hollow tiles must be removed and the wall repaired first.
How Microcement Is Applied
Every manufacturer's system is slightly different, but a typical bathroom application looks like this:
- Preparation. Repair, level and clean the walls and floor; remove loose tiles and fill grout lines.
- Tanking. Apply a waterproofing system in wet areas such as the shower.
- Primer. Help the microcement bond to the surface.
- Mesh and base coats. Embed a reinforcing mesh in the first coats to add strength.
- Finishing coats. Thinner, finer coats create the final texture and colour.
- Sanding. Light sanding between coats refines the finish.
- Sealing. Several coats of a protective sealer make the surface water and stain resistant.
- Curing. The surface needs time to cure before heavy use and showers.
According to Trade2Base, a small bathroom is usually a 3 to 5 day job once curing and sealing are included.
How Much Does a Microcement Bathroom Cost?
These are rough UK guide figures from Trade2Base's 2026 pricing, which are supply and apply rates; your quote will depend on the size and condition of the room, the finish and your area.
| Area | Rough installed cost |
|---|---|
| Floors | Around £80 to £150+ per m² |
| Dry feature walls | Around £100 to £140 per m² |
| Bathroom or wet room walls, including tanking and sealing | Around £130 to £180+ per m² |
| Shower enclosures and heavily detailed wet areas | Around £180+ per m² |
| Small ensuite wet room (worked example) | Roughly £2,500 to £3,000 |
Trade2Base's worked example, a small ensuite wet room with about 14m² of walls and 3m² of floor plus tanking and detailing, comes to around £2,770. Small, cut-up rooms cost more per m² than large, simple ones, and damaged or uneven walls add preparation time. Microcement floors are popular beyond the bathroom too, including as a stylish finish when replacing a garage floor in a conversion.
DIY kits are available, and Homebuilding & Renovating notes that materials for a bathroom of about 10m² can come to under £400. But microcement is a skilled trowel finish, and mistakes are hard to fix, so I'd only DIY a small, dry area such as a feature wall or a vanity, not a shower.
Colours, Finishes and Textures
Microcement comes in a wide range of colours, from chalky whites and warm greiges to clay pinks, terracottas, sage and charcoal. Most systems offer matt, satin and gloss finishes, and textures from smooth and continuous to a more visible, cloudy trowel movement.
- Warm greige and stone: calm, timeless and spa-like.
- Clay pink and terracotta: soft, earthy and Mediterranean. The sun-baked terracotta colour palette works beautifully in microcement.
- Chalky white: fresh and bright, especially in small bathrooms, with one of the softer white paint colours on the ceiling.
- Sage and soft green: natural and restful.
- Charcoal and concrete grey: dramatic and industrial, while softer warm greys feel especially restful, thanks to the calming psychology of grey.
A designer's tip: choose a matt or satin finish and a gentle texture. High gloss shows every mark and can feel cold; a soft, cloudy finish feels more natural and hides water marks better.
12 Microcement Bathroom Ideas
1. The full spa wrap. Walls, floor, shower and vanity in one warm greige, with brushed brass or nickel fittings and timber accents.
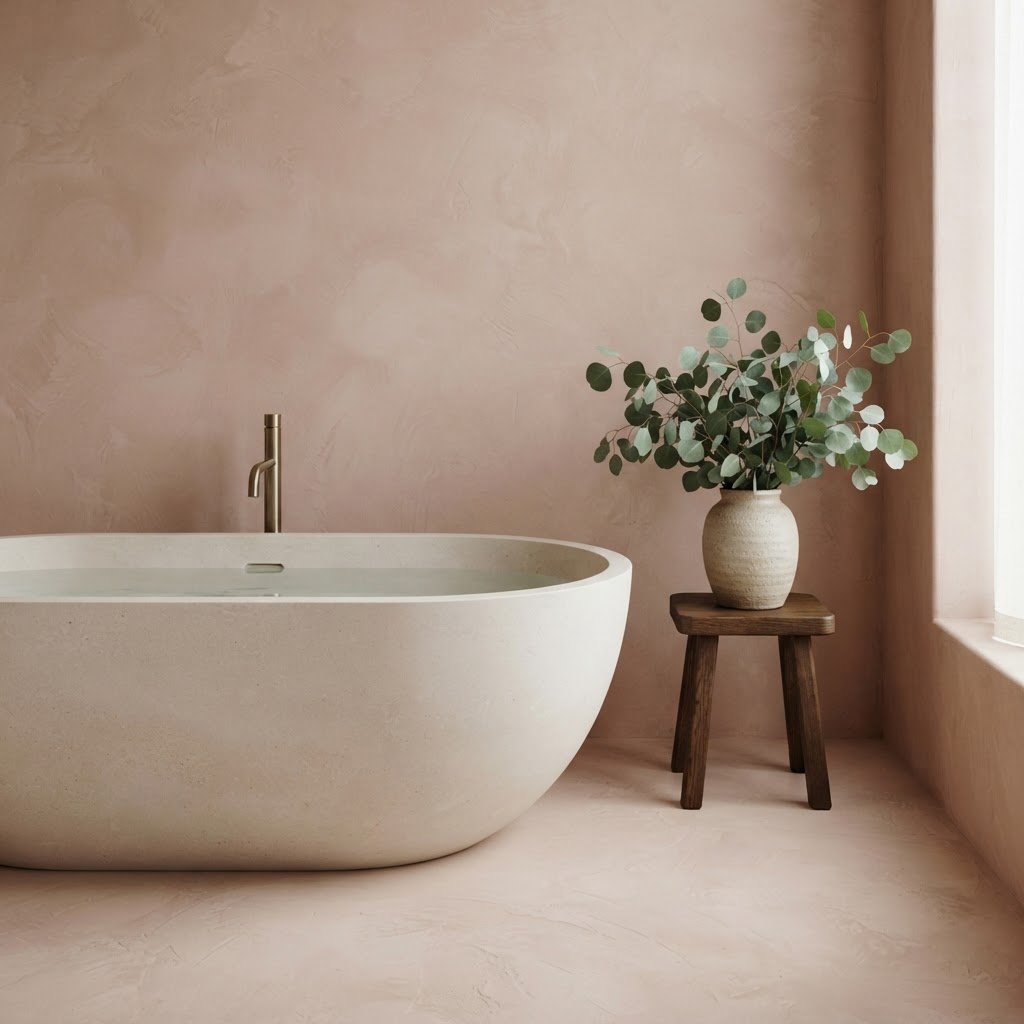
2. A clay pink sanctuary. Soft plaster pink microcement with a freestanding stone bath and natural linen feels warm and romantic.
3. A built-in vanity. A floating or plinth vanity coated in microcement to match the walls looks sculptural and has no joints to collect grime.
4. A walk-in shower with a bench. Built-in benches, niches and ledges in microcement make a wet room feel like a hotel spa.
5. Arched niches. Curved niches and arched mirrors soften the clean surfaces.
6. Two-tone walls. A deeper colour on the lower walls and a lighter tone above, or a contrasting shower zone, adds interest without tiles.
7. Microcement and timber. Warm oak or teak vanities, stools and duckboards balance the cool cement, in a calm Japandi spirit.
8. A Japanese style soaking tub. A deep built-in tub in microcement, with timber and soft lighting, creates a true bathing ritual. A Japanese soaking tub can be cast in microcement to any size.
9. Microcement with brass. Brushed brass taps, shower and mirror frames look especially luxurious against warm, matt microcement.
10. Small bathroom, no grout lines. In a small bathroom or cloakroom, a seamless pale microcement makes the room feel larger and calmer.
11. Microcement and terrazzo. A terrazzo basin or floor tiles add pattern and colour to a plain microcement scheme.
12. A Mediterranean wet room. Chalky white or warm stone microcement, a timber stool, a curved shower wall and terracotta accents give the feel of a whitewashed villa, the same mood as a limewashed Spanish style bedroom.
How to Clean and Maintain Microcement
- Use pH neutral cleaners. Homebuilding's experts recommend pH neutral products. Avoid bleach, acids, limescale removers and abrasive creams, which can damage the sealer.
- Squeegee the shower after use to reduce water marks and limescale.
- Ventilate well. A good extractor fan protects any bathroom surface and helps prevent mould, and if you're boarding the ceiling, moisture-resistant boards suit a bathroom tongue and groove ceiling.
- Look after the mastic. Keep silicone joints around baths, basins and trays in good condition, as they perish over time.
- Follow the manufacturer's advice on resealing, as many systems recommend topping up the protective finish over the years.
How Long Does Microcement Last?
It depends heavily on the quality of the installation. Richie Butt of Relentless Microcement told Homebuilding & Renovating that "it's not unusual for a microcement bathroom to last over 10 years", while Jason Hyatt of The Resin Floor Co suggested that, depending on the quality of the application, a microcement bathroom could last 5 to 10 years.
Choosing a Microcement Installer
Because the finish depends so much on the person applying it, choose carefully:
- Ask to see finished bathrooms, ideally ones that are a few years old.
- Check which system they use and whether they're trained or approved by the manufacturer.
- Ask how they tank showers and detail corners, drains and niches.
- Get a written quote that includes preparation, tanking, sealing and curing time.
- Ask about aftercare and what happens if a crack or defect appears.
Common Mistakes to Avoid
| Mistake | Why it's a problem | What to do instead |
|---|---|---|
| Applying over loose or cracked tiles | Movement causes cracks | Remove and repair unsound areas first |
| Skipping tanking in the shower | Water can get behind the finish | Use a proper tanking system in wet zones |
| Choosing the cheapest installer | Poor application is hard to fix | Choose experience and a proven system |
| High gloss in a busy bathroom | Shows marks and water spots | Choose matt or satin |
| Harsh cleaning products | Damages the sealer | Use pH neutral cleaners |
| Using the shower too soon | The finish hasn't cured | Follow the installer's curing time |
Frequently Asked Questions
Is microcement good for bathrooms?
Yes, when it's a system designed for wet areas, applied by a skilled installer with proper tanking and sealing. It's seamless, easy to clean and can coat walls, floors and fixtures.
Is microcement waterproof?
The right system can be. Use a microcement rated for wet areas, a tanking system in showers and several coats of sealer. Don't rely on a sealer alone over a non-waterproof product.
Can you put microcement over tiles?
Often, yes, if the tiles are sound and well fixed. Grout lines are filled and primed, and a reinforcing mesh is usually used in the base coat.
Is microcement slippery in a shower?
It can be if a smooth, glossy finish is used. Many manufacturers offer non-slip finishes for floors and shower trays, so ask for one in wet areas.
Does microcement crack?
It can crack if the wall or floor underneath moves, or if it's applied over unstable tiles or a damp substrate. Good preparation and reinforcing mesh reduce the risk.
How much does a microcement bathroom cost in the UK?
Roughly £130 to £180+ per m² for bathroom walls including tanking and sealing, and around £80 to £150+ per m² for floors. A small ensuite wet room might cost around £2,500 to £3,000.
How long does a microcement bathroom last?
Experts quoted by Homebuilding & Renovating suggest around 5 to 10 years, and often more than 10 years when it's well applied and maintained.
Is microcement cheaper than tiles?
Usually not. Microcement typically costs more than mid-range tiling, but it can save the cost of removing old tiles, and some people value the seamless look and easier cleaning.
A Seamless, Spa-Like Bathroom
A microcement bathroom can be calm, beautiful and easy to live with, but it's only as good as its installation. Choose a wet-area system, insist on proper tanking and sealing, pick a soft matt finish and look after it with gentle cleaners, and it will feel like a spa for years.
For more bathroom and renovation ideas, explore the interior design section, and if you'd like help choosing colours, finishes and fittings for your bathroom, you can book a one-hour online interior design consultation with me.
About the author
Magda Callery is a UK interior designer and florist with more than 15 years' experience designing homes, pubs, restaurants and bars, and her expert commentary has featured in Homes & Gardens, The Mirror and The Spruce. Explore more of the interior design articles.
Continue reading


Faux Ceiling Beams: Ideas, Materials and Installation
A designer's guide to faux ceiling beams: what they are, polyurethane vs timber, how to size and space them, 15 ideas for living rooms, kitchens and bedrooms, rough costs, safety points and a step by step installation guide.

Sage Green Kitchen Cabinets: Paint Colours and Ideas
A designer's guide to sage green kitchen cabinets: the best sage paint colours, what worktops, handles, walls and floors to pair them with, 10 kitchen ideas, how to paint your cabinets properly, rough costs and mistakes to avoid.


Tongue and Groove Ceiling: Ideas and How to Install
Everything you need to know about tongue and groove ceilings: how they differ from shiplap and beadboard, materials and profiles, 15 ideas, rough UK costs, the fire safety rules many guides miss, and a step by step installation guide.